Flektagon
4/50
Sticky Iris Repair.
WARNING: You may break or damage your lens if your not careful. I'm not responsible if you follow the information on this page
Proceed at your own risk.
Tools needed: screw drivers, a spanner wrench, and a piece of rubber
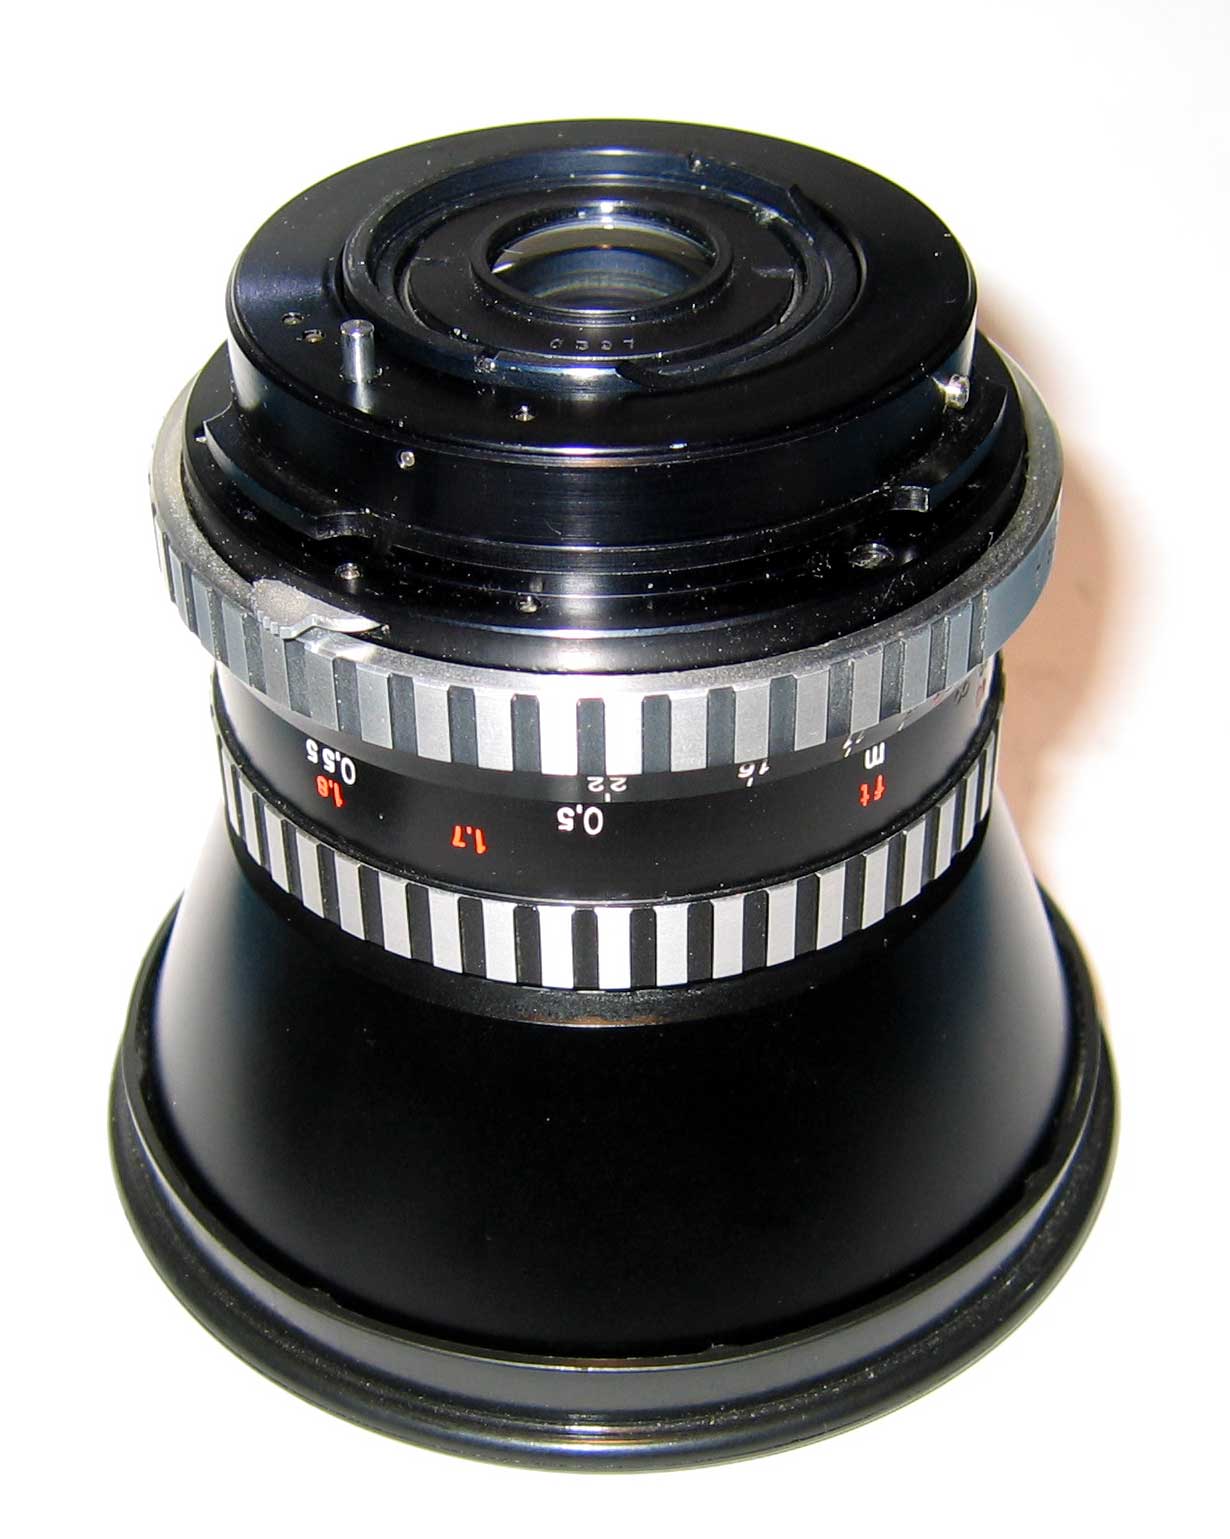
The lens
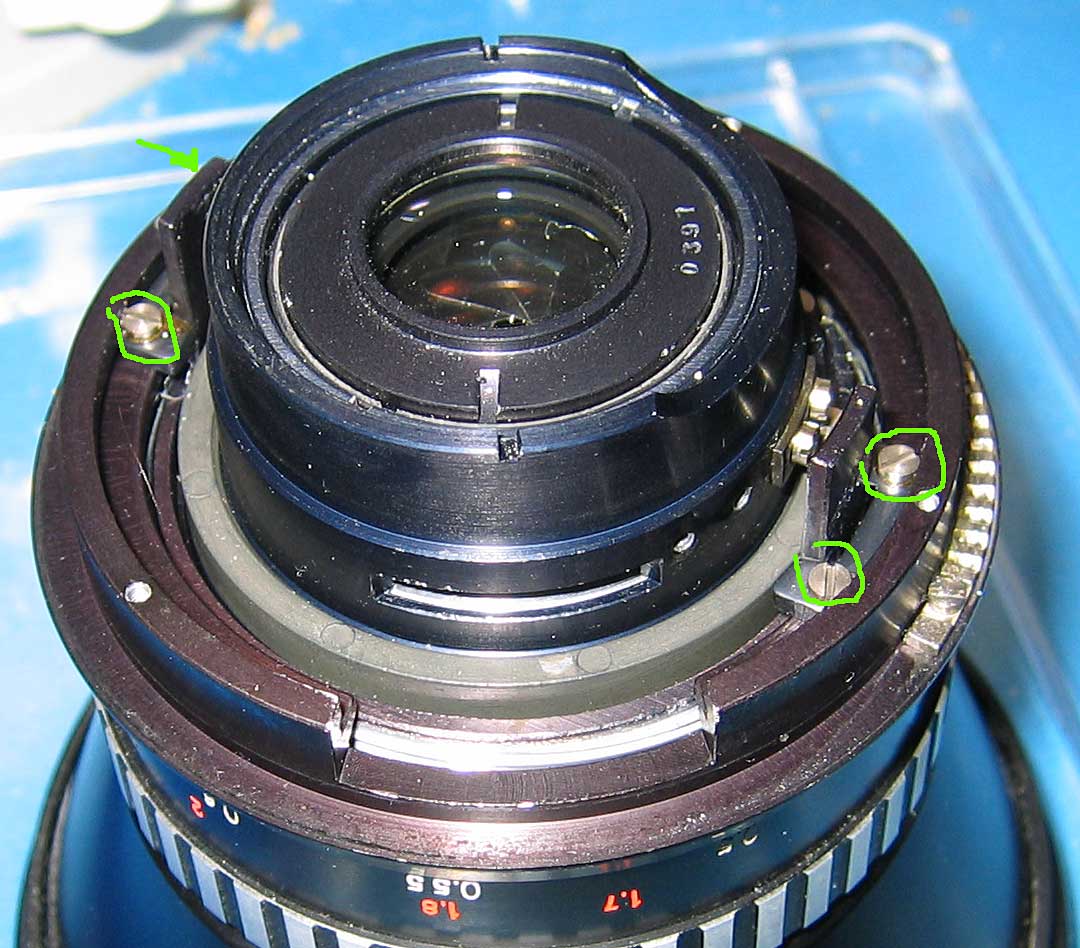
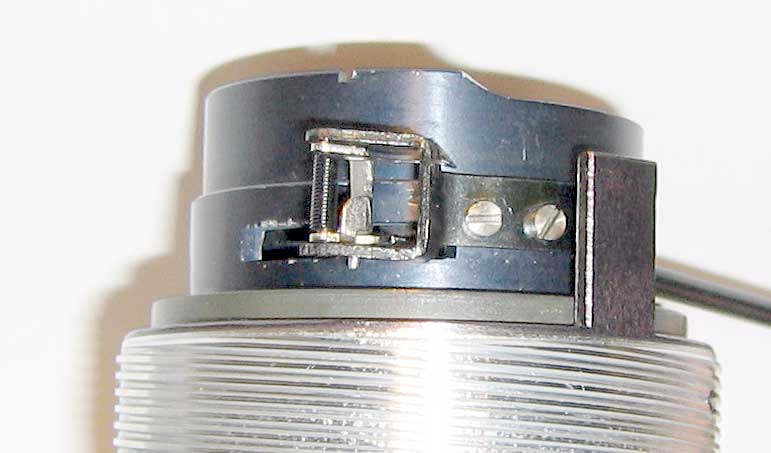
P6 Mount
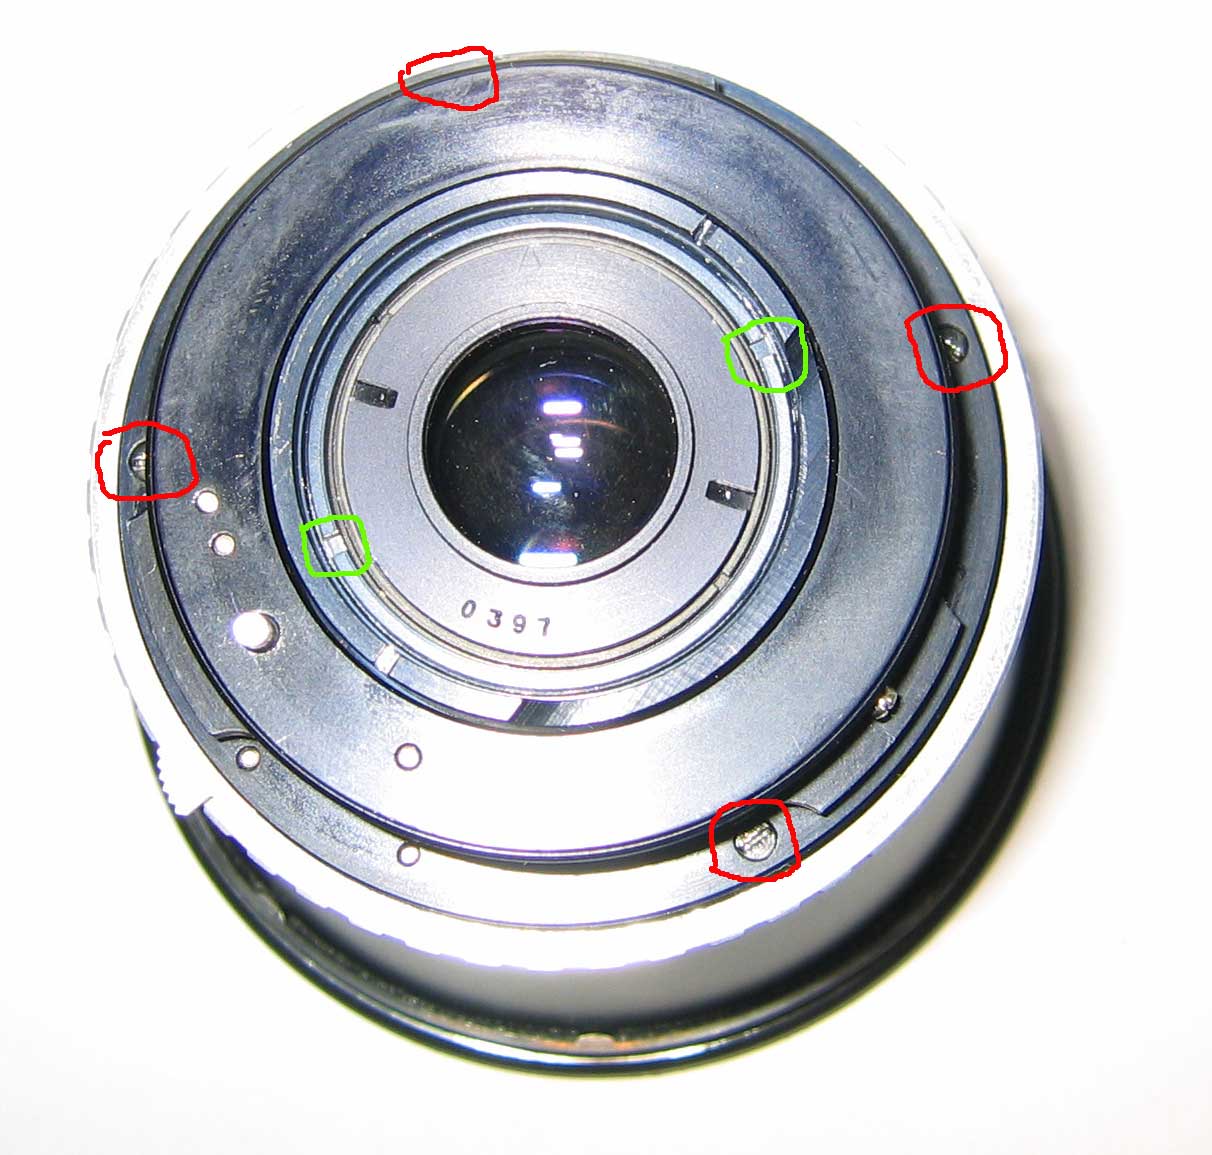
Remove the four screws holding the mount and lift
it off. It only fits one way. Remove the f/stop ring, watch for the
click stop ball or rod. On my Zebra version it's a spring loaded rod, the later
version I have uses an itty bitty ball. Remove the rear lens retaining
ring using only the slots in the second outer most ring (marked in green). Remove the lens, there will be a total of
three parts: retaining ring you just removed, a spacer ring, the rear lens
cartridge.
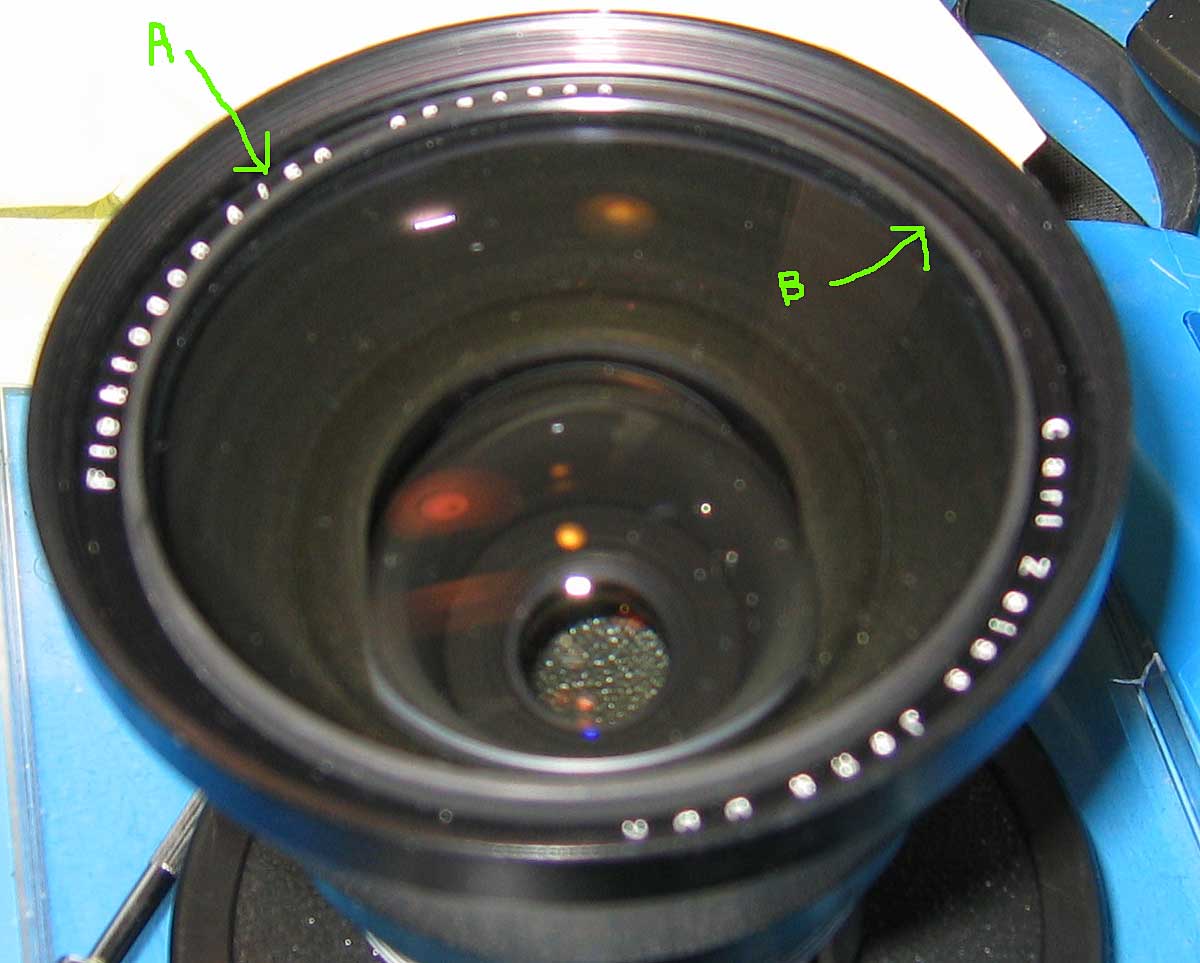
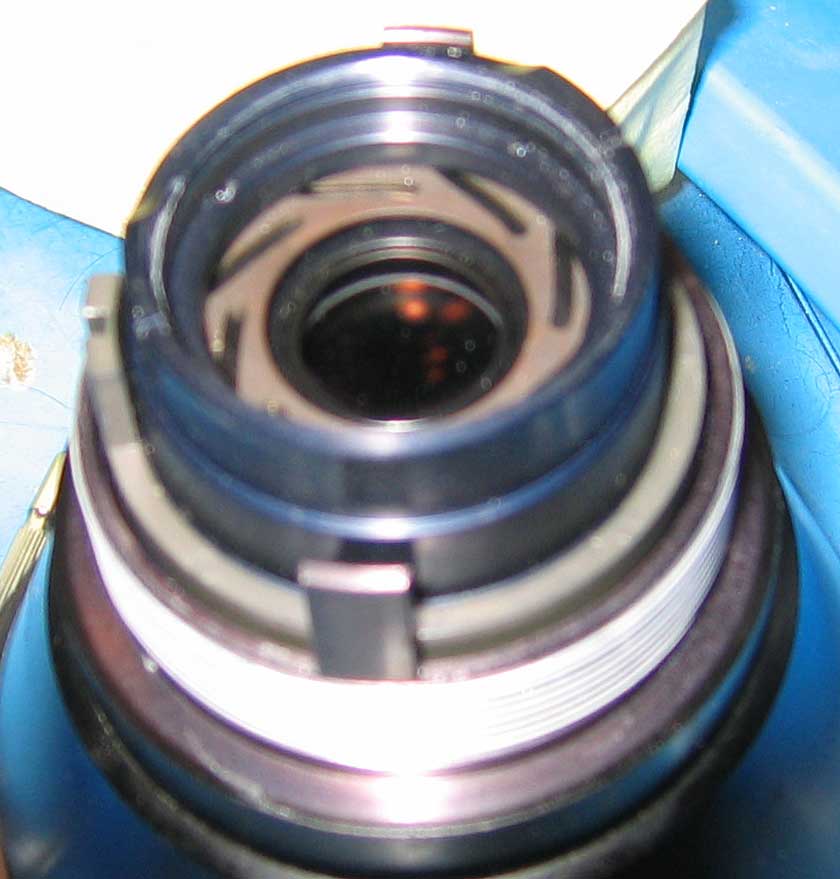
Only turn the trim ring A, there are no slots or holes in it.
Do not turn part B.
I used a piece of rubber to get a grip on the trim ring. Luckily it wasn't
very tight on mine.
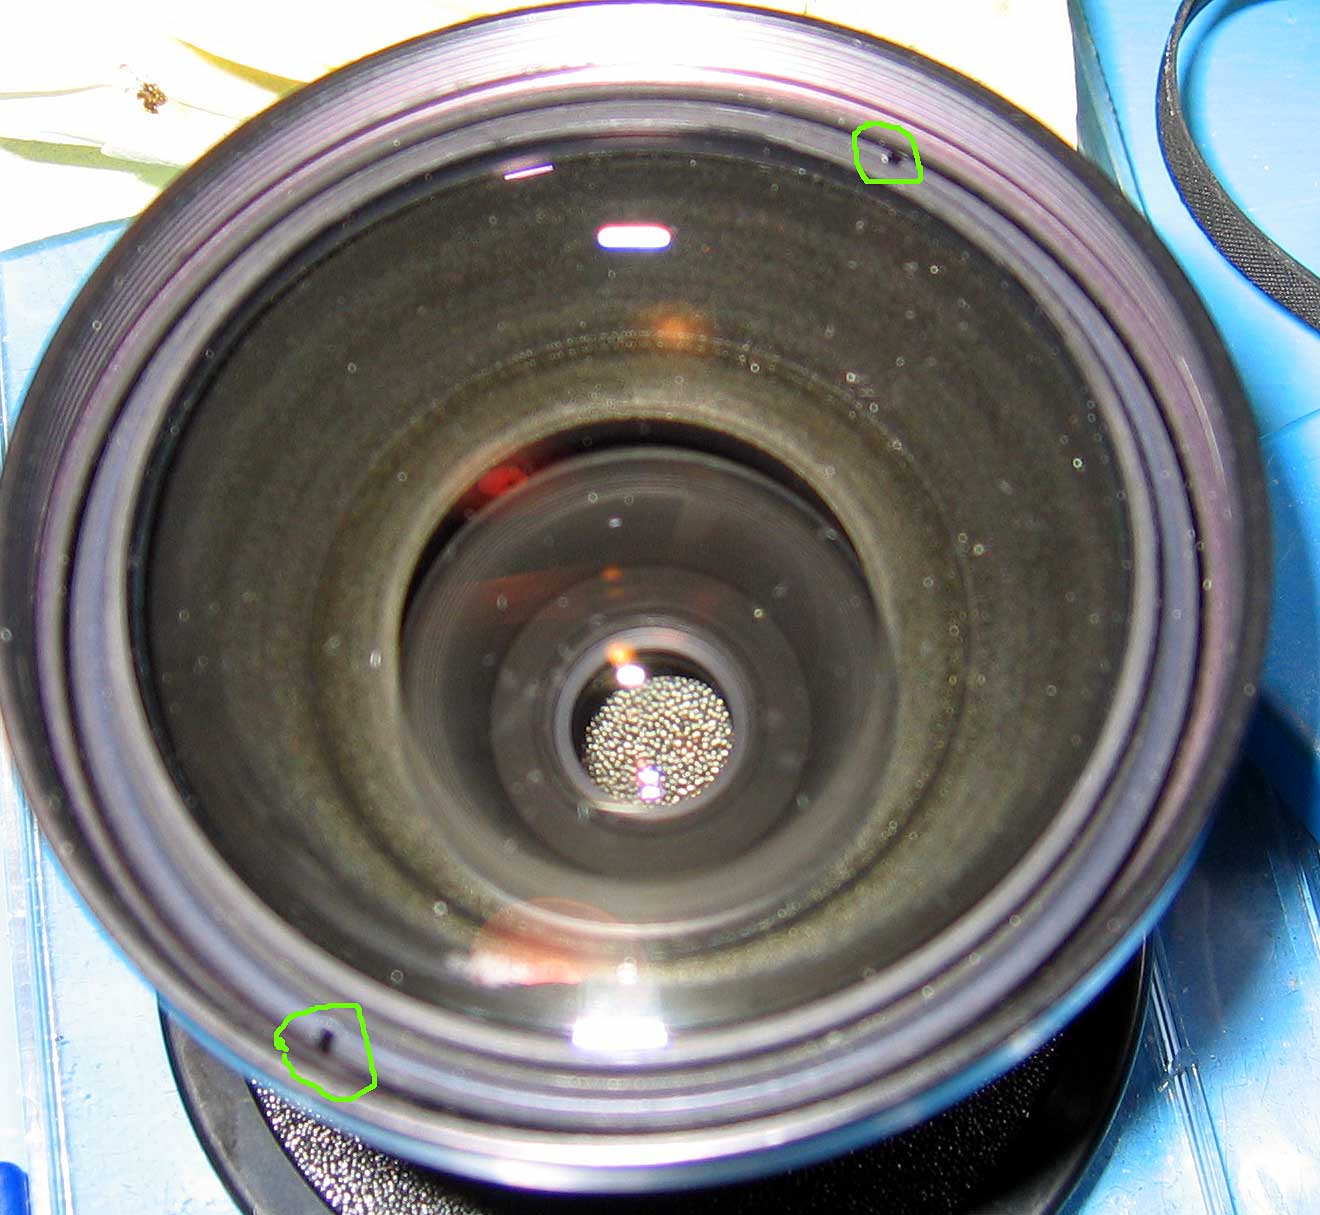
Only use the slots circled in green to remove the lens cartridge. That outer ring holds the lenses in the cartridge.
Removing the focusing ring is optional. I removed mine so that I didn't have to worry about getting the lighter fluid in that area.
![]()
Remove the two screws to remove the spring so that the focus ring may be removed.
Remove the screws on the lock tabs. Two on each side, then remove the U shaped parts. There may be some shellac on these, which make them very tight fitting.

The locks removed, you can now removed the focusing ring.
MAKE NOTE OF WHERE IT STOPS AND COMES OFF.
The focusing helical has multi-entry threads.
What it looks like with everything removed (except the front
lens section)
Yes I know it's not in focus.
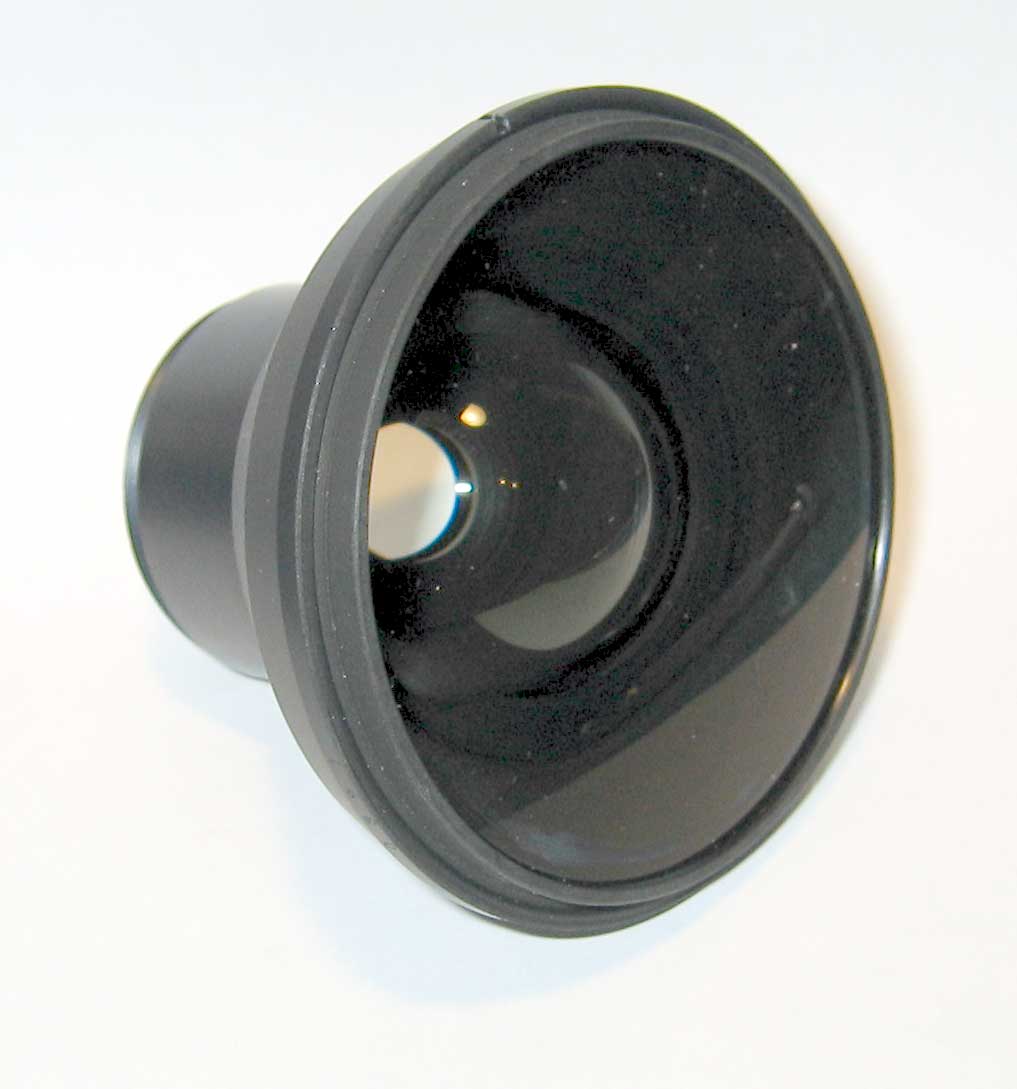
The front lens cartridge.

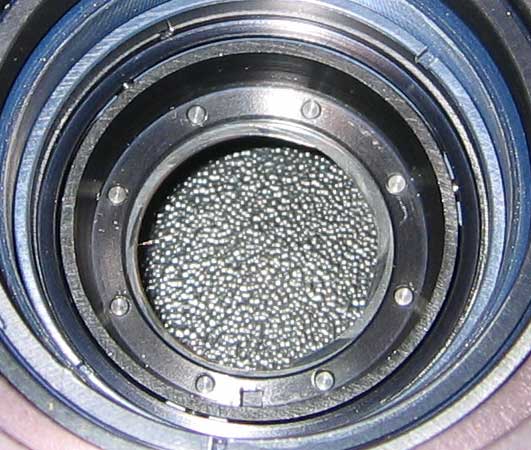
Inside the housing.
1 - the ring that opens/closes the iris
2 - the iris
You do not have to do any further disassembly of the housing.
Close up of the iris assembly. The notch in the bottom is where the spring lever rides. Flush this section with lighter fluid from both sides. I reinstalled the spring lever to assist in operating the iris and used the part the f/stop ring connects to operate the iris. Once it's moving freely and clean, let it dry.
![]()
Spring lever position for iris closed.
Spring lever position for iris open.
Make sure there is no binding in the spring lever assembly. On my lens, this was causing part of the sticking problem. The lever should be straight flat and not twisted. Don't break that spring, they're made of unobtainium.
Remove the spring lever to reinstall the focusing ring. I used a few dabs of Micro-Tools 795A damping grease on the threads.
You did remember to note the starting and ending spot, didn't you. :-)
Reinstall the locks.
Reinstall the spring lever, making sure the iris opens and closes with no binding anywhere in its travel.
Reinstall the f/stop ring, make sure the click ball or rod is in place and the long screw is in the slot so it can open/close the iris.
Reinstall the mount, it only goes on one way. Check the stop down pin is function correctly. Check to see if the iris is still working correctly. Set to f/22, press and release the stop down pin. The iris should snap open when it's released.
Reinstall the rear and front lens cartridges and trim ring. Install the front one first, then open the iris, check for dust, then install the rear lens. If you have any dust in there, it could affect your pictures.
Check the infinity focus. If it's not right, you have the focusing ring in the wrong thread.
Last update: 09/26/2003
© by Stephen Castello All Rights Reserved